It’s no surprise that PCs and Macs do not work well with each other, due to differences between the two operating systems (Windows vs. macOS).
- Flash Memory Low Level Format Tool For Mac Os
- Dos Low Level Format Tool
- Flash Memory Low Level Format Tool For Mac Os X
- Western Digital Low Level Format
- Hdd Low Level Format Tool
HDD Low Level Format Tool as well as allowing us to apply low-level formatting to hard drives, will also allow us to apply this format system to flash memories, thus leaving them completely without format. This process can be carried out by USB or by means of a card reader.
Connect the Lexar USB flash drive to PC, download and launch EaseUS Lexar USB format tool, right-click the flash drive and choose 'Format partition'. Configure the label you want in the Partition Label box and then select a file system in the 'File System' drop-down list for the Lexar flash drive. HDD Low Level Format Tool software can repair hard disk sectors and clear partitions,MBR and all data inside the hard disk for ever.HDD low level formatting utility support many operation system 'MS Windows XP, Vista, 7, 8, Server 2003, 2008, 2008R2 '. Low level format tool helps low-level format a whole HDD, USB drive and memory card, for the purpose of formatting a bootable drive, repairing track 0 bad, removing write protection, computer virus and troubleshooting Windows was unable to complete the format. USB Disk Storage Format Tool. As the second disk formatting tool tested and listed here, USB disk storage format tool is also 100% freeware and allows people to completely format any USB flash drive or memory card with FAT, FAT32, exFAT and NTFS file system formats. HDD Low Level Format Tool.
One main difference is the file system. By default, Macs are with HFS+ (since 2017 there’s new Apple File System, APFS, optimized for flash storage), while PCs are with NTFS.
If you have a USB drive, and you plan to use it on both a Mac and PC, things can get a bit tricky here. What do I mean?
If your disk was initially formatted to NTFS on a PC (or HFS+ on a Mac), most likely you’ll suffer limitations, for example, the data on your drive can’t be read or written on one of your computers.
Fortunately, there is a file system (actually two, I’ll explain) that you can format your flash drive to be fully compatible with Mac and PC. In other words, you can access the drive and transfer data without any hassles.
That file system is — exFAT. Note that there is another file system called FAT32 that pretty much does the same thing but with one major flaw. See the table below for more info. Dashboard service tool download for mac.
Major File System Comparison
| Compatible with macOS? | Compatible with Windows? | Max. file size | Max. partition size | |
|---|---|---|---|---|
| HFS+ | Yes | No | No limit | No limit |
| NTFS | Partially | Yes | No limit | No limit |
| FAT32 | Yes | Yes | 4GB | 8GB |
| exFAT | Yes | Yes | No limit | No limit |
As you can see, exFAT is the only file system that works with all versions of Windows and macOS and does not have any max file-size or partition-size limits. Therefore, it’s perfect for a USB flash drive or external disk, especially when you need to save files more than 4GB in size. You should go ahead and format your storage drive with exFAT instead of FAT32, assuming that all devices you want to use the drive support exFAT.
You may notice that in NTFS is marked “Partially” under the Compatible with macOS column. This is because an NTFS-based drive can be read by macOS but you can’t write data to the drive.
Flash Memory Low Level Format Tool For Mac Os
Now that you’ve learned exFAT is the ideal file system to go. How to know what current file system your flash drive is with, and how to format it to exFAT?
Read on for step by step instructions…
How to Check a USB Drive’s File System?
First of all, plug your flash drive into the USB port on your computer. Make sure your device can be detected and recognized. I’m here to use a 32GB Lexar USB key as an example.
If you are on a Mac…
Yes, there are 3–4 tools which will help you to grab a screenshot like mac on windows. Print screen on windows is simple as print screen mac. Few tools like lightshot, skitch and snip is. The Best Screen Capture Tool for Mac OS X OS X already offers a means of capturing screenshots with a few keyboard shortcuts, but if you want Read more Read. Jun 15, 2013 Screenshot in Bootcamp Hi! I have a MacBook with Windows 7 Home Premium on the Bootcamp side. I am trying to take a screen shot on my MacBook keyboard on the Windows 7 side--I have tried every combination of commands on every Apple board, and it is not working for me, nor do I have the Snipping tool. Mac screenshot software. PicPick is a Windows tool for screenshots, and it enables you to capture, edit and share images. PicPick is highly customizable, and it lets you configure things like hotkeys and image quality. PicPick is highly customizable, and it lets you configure things like hotkeys and image quality.
Once the Lexar disk shows up on the desktop, right-click on the drive icon and select “Get Info.”
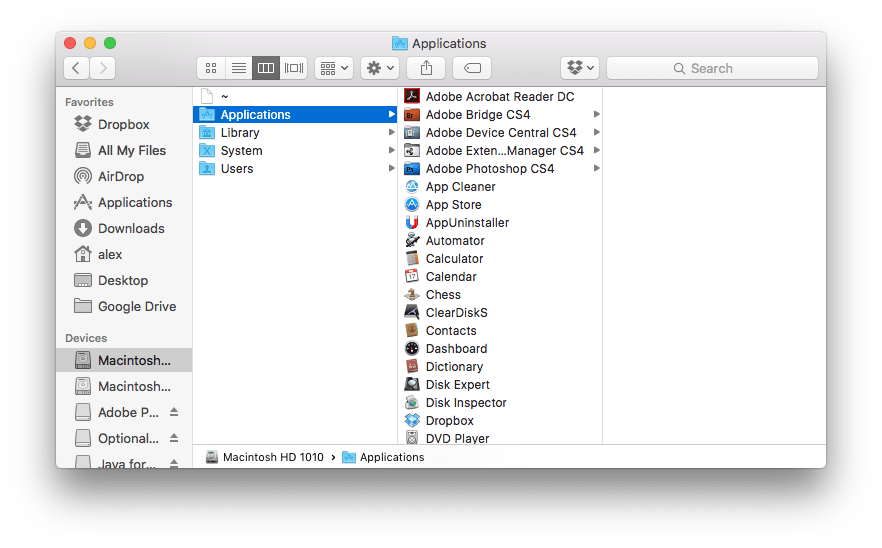
Alternatively (in case the disk does not show up on your desktop), open Finder, on the sidebar menu locate your USB drive under Devices, right-click and select “Get Info.”
In the new dialogue, pay attention to General > Format, where it says “MS-DOS (FAT32)”. That means my Lexar disk is currently with the FAT32 file system.
If you are on a PC…
Go to This PC, under “Devices and drives,” highlight the disk that represents your USB flash drive, right-click and select Properties.
In the new Properties window, check General > File system and you’ll see what type of file system your flash drive is currently with. Note: since I’ve formatted my Lexar drive on my Mac, now it shows exFAT.
How to Format Your USB Flash Drive to ExFAT?
Important: make sure you have at least one backup of all the data stored on the device before you proceed. Because the process of reformatting a disk drive will very likely erase all content and make recovery impossible. Read this USB drive data recovery guide for more information.
Also, since I don’t know whether you are on a PC or Mac to perform this operation, I’m here to break down this guide into two parts. The first part is for Mac users, and the second part is for PC users (Windows 10 based). In no particular order.
Part 1: Formatting USB Drive On Mac
Please note: since OS X 10.11 El Capitan (the latest is 10.13 High Sierra), Apple made a few changes to Disk Utility (see details from this ComputerWorld article). The app now has a new user interface that looks slightly different on Yosemite or earlier OS X versions.
Step 1: Open Disk Utility. The quickest way is to search on Spotlight and click the result under “TOP HIT.” Alternatively, you can access it via Finder > Applications > Utilities > Disk Utility.
Step 2: Under “External” tab, highlight your flash drive. Note: right below your device name, it also shows information about the drive e.g. size, file system, etc. In my case, I can see it’s a 32GB volume in MS-DOS(FAT) file system.
Step 3: Now click the “Erase” button at the top. In the new pop-up window, choose the format to be “ExFAT”. You may also change the device name if you want. Then hit the “Erase” button to continue. Kind reminder: make sure you have backed up the data before you do this.
Step 4: Wait until the erasing process to complete. It should be very quick (only a few seconds to format my 32GB Lexar drive).
Step 5: This step is optional. I’m showing this to verify that the USB drive has been reformatted to the file system I wanted. I saved several files to the disk, and open Disk Utility again. And yes … it’s now with the exFAT file system.
Part 2: Formatting USB on a Windows PC
Please note: I’m here to use a Windows 10 based HP laptop to format my Lexar drive. If you are on an earlier operating system like Windows 7, XP, etc. The screenshots may look slightly different. For example, in Windows XP “My Computer” is equivalent to “This PC’ on Windows 10.
Dos Low Level Format Tool
Step 1: Locate your USB stick under “This PC,” right-click on it and select the “Format…” option.
Step 2: A new window pops up prompting options you need to select before starting. The only thing you have to check is under “File system,” make sure you have chosen “exFAT.” You may also rename the device drive under “Volume label.” Then click the “Start” button to continue.
Step 3: You’ll see this warning. Once again, make sure you’ve backed up all important data stored in the drive. Click “OK.”
Step 4: It says “Format Complete,” done!
Pro tip: chances are that you may encounter some issues formatting a flash drive on a PC or the disk is malfunctioning. If so, the following articles may be of help to you:
Final Words
Most of the external hard disks and flash drives are formatted for Microsoft Windows operating systems. That makes using the drive a bit troublesome on Mac machines. FAT32 is popular but the 4GB file-size limit makes it inconvenient, for instance, when you want to make a bootable macOS Sierra USB drive which the system file takes about 8GB of storage space according to Apple.
Thankfully, exFAT — a strict upgrade over FAT32, is a file system optimized for USB flash drives. Like I said, if you want to use the device for both a PC and Mac, you should consider reformatting it to exFAT once you figure out the drive isn’t with another file system.
Hope the above guide is helpful to you. Once again, as a kind warning: formatting a flash drive will likely erase all files and data stored in the device, it’s vital to ensure you have made at least one copy of the data before you get started.
Influenced by the startup culture in the Silicon Valley, Jessica loves building things from zero to one and is keen on following news related to the Big Five tech giants and many SaaS startups.
Format any types of usb flash drive.HDD LLF Low Level Format Tool can format any type of HDD,Flash drive and memory card .Try it now
HDD LLF Low Level Format Tool features
Low Level Format Tool is one of the most strongest formatting software .You can format any type of hard disks ,flash drive and memory card .Low Level Format Tool support a lot of many operation systems such as MS Windows XP, Vista x32/x64, 7 x32/x64, Server 2003, 2008 and 2008R2 .
Low Level Format Tool support the following :
Toshiba , cruzer,sandisk,datatraveller,kingstone,kingmax,hynix,sony,transcend,infinity,jet flash, memory card types and alot of flash drive types
Hard Disk Types : Support S-sata , IDE ,SCSi,..,etcMaxtor, Hitachi, Seagate, Samsung, Toshiba, Fujitsu, IBM, Quantum, Western Digital and a lot of other types .
How to use Low Level Format Tool
First Plug in your usb flash drive ,then open Low Level Format Tool

Choose you usb flash drive then press continue .Wait until finish formatting
WARNING:After running this low level format tool, the whole disk surface will be erased.
Now we finish the lesson my friends . please if you have a question tell me ,feel free to contact me in any time .
please if you like this article , share it or leave a comment for supporting me to continue in this field .Thank you
Tags
Low Level Format Tool,format HDD, format flash drive ,format memory card,
Flash Memory Low Level Format Tool For Mac Os X
Western Digital Low Level Format
you can visit the official site of the program
low level format tool official siteIf this software doesn't work with your flash drive ,Also i recommend this article to read it , it will help you '
Download low level format tool software
Download Info
Hdd Low Level Format Tool
Program Version :4.25
Os : Windows XP, Vista, 2003, 2008, Windows 7,mac
Os : Windows XP, Vista, 2003, 2008, Windows 7,mac
Please choose any server to download the software
Download Low level format tool
Low level format utility-Mediafire
